Taking great photos in the snow is no mean feat! Your camera is used to taking pictures of things like beautiful green pastures, busting city streets and holiday snaps on the beach; definitely not mountain landscapes with eye-burningly white snow. And if that’s not hard enough to deal with, the bleached white snow is amplified by uninhibited high-altitude sunshine. There’s no doubt that taking photos in the snow can be a tricky and painful experience at times.
At altitude the sun is way stronger, so terrible lens glare is often an issue. The snow acts like a mirror and reflects tons of light meaning your camera will often overcompensate by under-exposing photos. And if it isn't sunny, it's really hard to take photos that aren't grey and dull with no contrast.
But don’t fret; if you can get your head round the reasons why your camera acts like it does, there are some amazing photo opportunities to be had out there. Here are 10 of my top tricks and tips that will really enhance the quality of your ski holiday photo album.
1) Exposure
Snow can seriously confuse your camera as in most cases your subject is much darker than the overpoweringly bright background. Don’t worry if the snow is a little over exposed, it’s your subject that matters. In snow your camera will often become confused by the amount of white in a shot and assume it’s over exposed. It’ll compensate by underexposing photos. Be aware of this and combat it by either adjusting the exposure settings on your camera (there should be an exposure compensation area within the main menu on your camera) or just adjust the photo when you’ve imported it onto your computer.
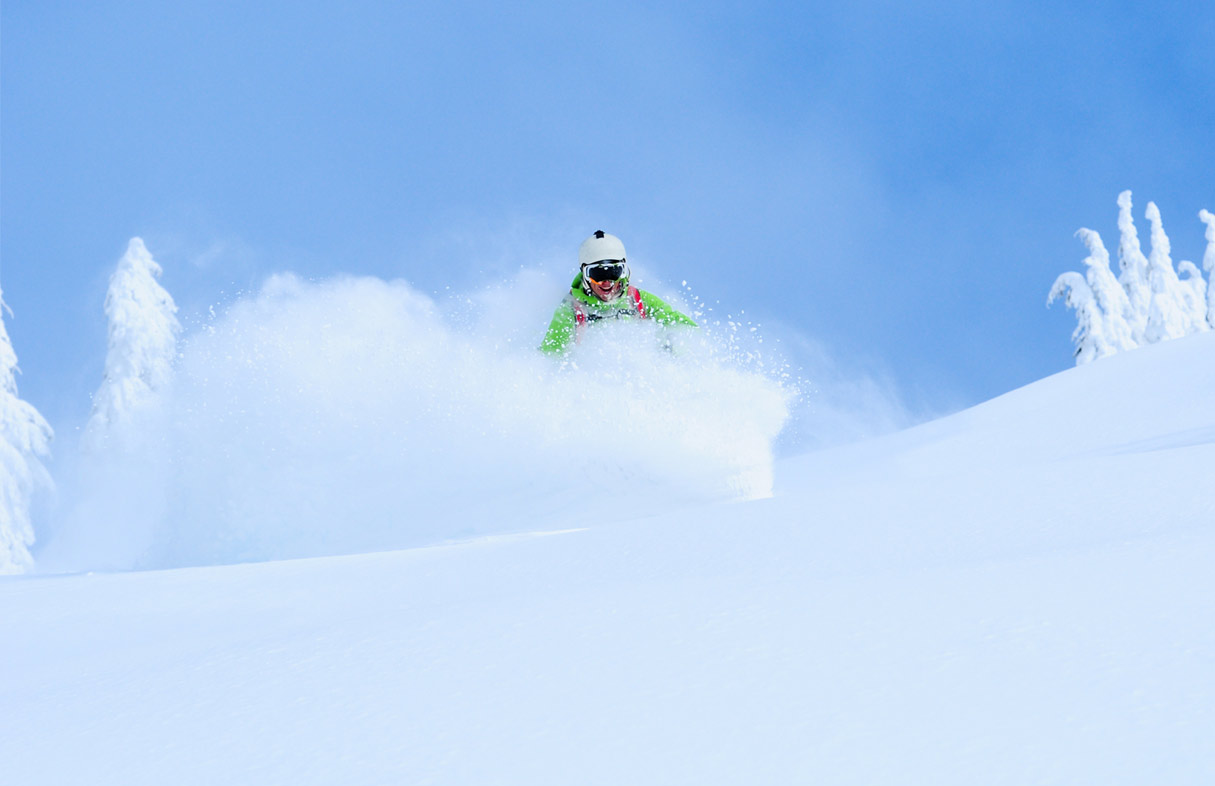
Photo - Tourism-Whistler, Mike-Crane
2) Contrast and Colour
When it isn't sunny ski photos tend to come out grey and colourless. In most cases you want to avoid adding too much contrast but when snow is involved and it's dull and monotone, use it to your advantage. The same goes for colour - enhance it when your photos come out dull with lacking contrast. The moral here - contrast and colour is king!
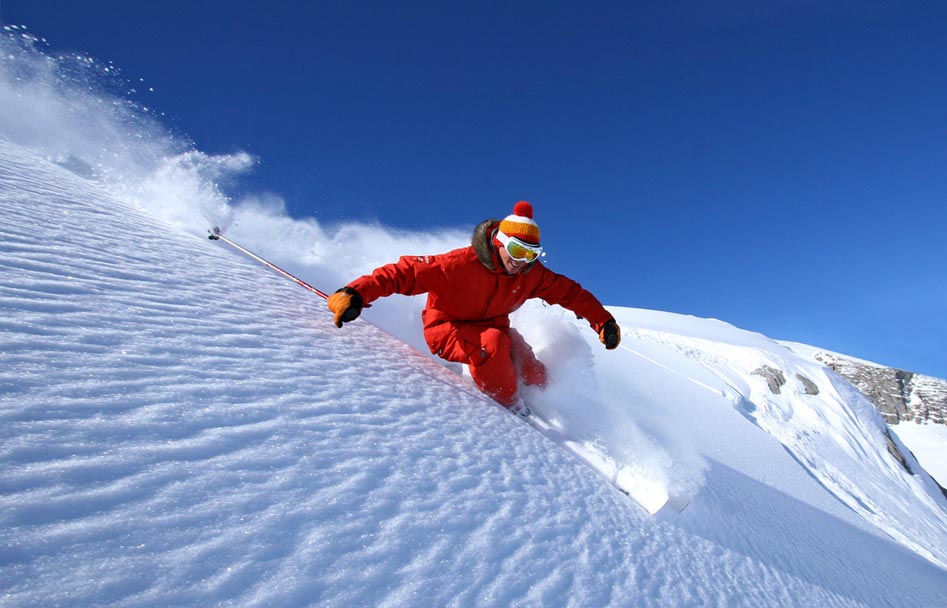
Photo - Val Thorens, Bruno Longo.
3) Pick your Moment
When you’re in the mountains you’ll find the clouds move quickly so you’ll often get intermittent bursts of sunshine coming through. If you have the time, wait for a break in the clouds and you’ll see a dramatic improvement in your photos with a boost of essential colour and contrast.

Photo: Chamonix, photographer unknown
4) Direction of the Sun
Your subjects will squint if they’re looking directly at the sun and if you’re shooting into the sun you’ll get heavy lens flare. Ideally position the sun just behind you, at either side of your subject and at the photographer’s 4 or 8 o’clock.

Photo - Whistler, Amy McDermid
5) Remember the Golden Hours
Time of day is hugely important. During the middle of the day the sun is high and very strong and so the snow can become intensely bright. You’ll find it much easier to take photos in the morning when the sun is still low or in the evening as the sun sets. Always remember the golden hours; an hour after sunrise and an hour before sunset are fantastic times for taking photos. Although if you have a great sunset shot in mind for the evening, be weary of the sun passing behind a mountain peak earlier than you’d expected.
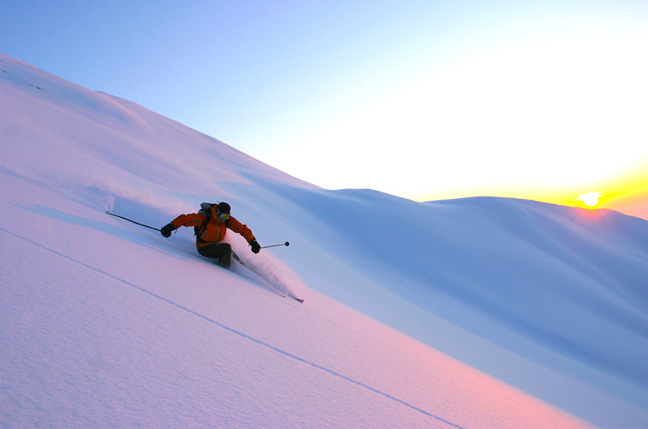
Photo: Avoriaz, photographer unknown
6) Condensation
If you’re coming out of a warm restaurant on the mountain or a cosy chalet the chances are that your camera will steam up. Don’t panic. Let it acclimatise for 5-10 minutes and it should clear up.
7) White Balance
When taking photos during the day, snow often comes out with a strange blue tint to it. This is most probably you’re white balance settings. Some cameras don’t offer the ability to change your white balance setting but if your camera does, tweaking it so the snow actually appears white and not blue will make an enormous difference to your photos. Consult your camera manual for the exact instructions on this but on my camera, I simply take a photo of an area of snow that’s in the shade and set this as my custom white balance setting.
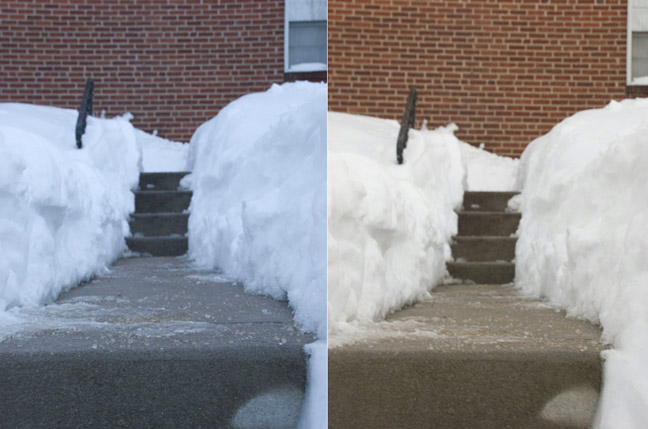
Photo: http://www.shutterphoto.net/
8) Protect your Camera from the Cold
Before bringing your camera in from the cold try and let it acclimatise to an unheated room before bringing it into a cosy living room. This will avoid condensation build up that can potentially damage your camera. Likewise, if you’re camera has built up condensation on it, make sure it’s completely evaporated before heading back out. Otherwise you risk damaging the camera when the condensation freezes.
9) Snowing Effects
When it’s snowing and your subject is motionless, use a slower shutter speed and the snowflakes will appear to streak across the photo - it adds a sense of movement and provides your shots with a really nice effect. Note that your camera has to be completely static when you’re taking photos with a long exposure, so to avoid blurring you’ll either need a tripod or something to sit your camera on when taking the shot. There’s loads of scope to be creative here so try things like combining the use of your flash with longer exposures and you’ll get a range of different effects.
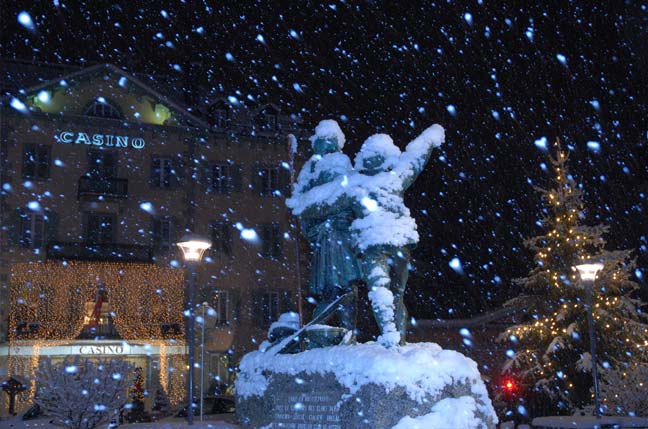
Photo - Chamonix town centre, photographer unknown
10) Charge your Battery
This sounds pretty obvious but make sure you fully charge your camera’s batteries before a day skiing – a change of just 10 degrees can sap up to 50% of your cameras battery output and there’s nothing more annoying than realising you’re camera’s out of juice when you’ve just found a great photo opportunity.
Have we missed anything here? Are there any tips that should have been included in the top ten? If so, leave a comment below; we’d love to hear your thoughts.
Posted by Adam Wagner on Friday 27 Jun 2014